Steps of Wine Tasting That Actually Change How Wine Tastes
Someone hands you a glass, asks what you think, and suddenly “good” feels like the wrong answer. Relax. The steps of wine tasting aren't a performance or a test of your nose. They're a repeatable way to notice what the wine is doing, then decide whether you like it.
The classic sequence is simple: see, swirl, sniff, sip, savor. Use it with a bottle at home, a restaurant pour, or a flight with friends, and you'll feel more comfortable without memorizing a wall of wine vocabulary.
Table of Contents
- What Tasting Wine Actually Looks Like
- See the Wine Before You Smell It
- Swirl and Sniff in Two Passes
- Sip Slowly and Read the Structure
- Resetting Between Glasses in a Flight
- Why Your Own Preference Matters More Than Nailing the Note
- Practice This Tonight and Build the Habit
What Tasting Wine Actually Looks Like
A friend tilts a glass over the dinner table and studies the wine like it contains a hidden message. The wine list is open, everyone else seems confident, and you're wondering whether you're supposed to say “blackberry” or “wet stone.” You aren't missing a secret class. Wine tasting is just focused drinking with a useful order.
The familiar five-step approach developed over a long period of standardization. The word “tasting” first appeared in 1519, while formal methods developed over centuries, with the methodology becoming established by the 14th century and further formalized in the 18th century through figures such as Linnaeus and Poncelet, as described in this history of wine tasting. The sequence now commonly appears as the five S approach, see, swirl, sniff, sip, savor.
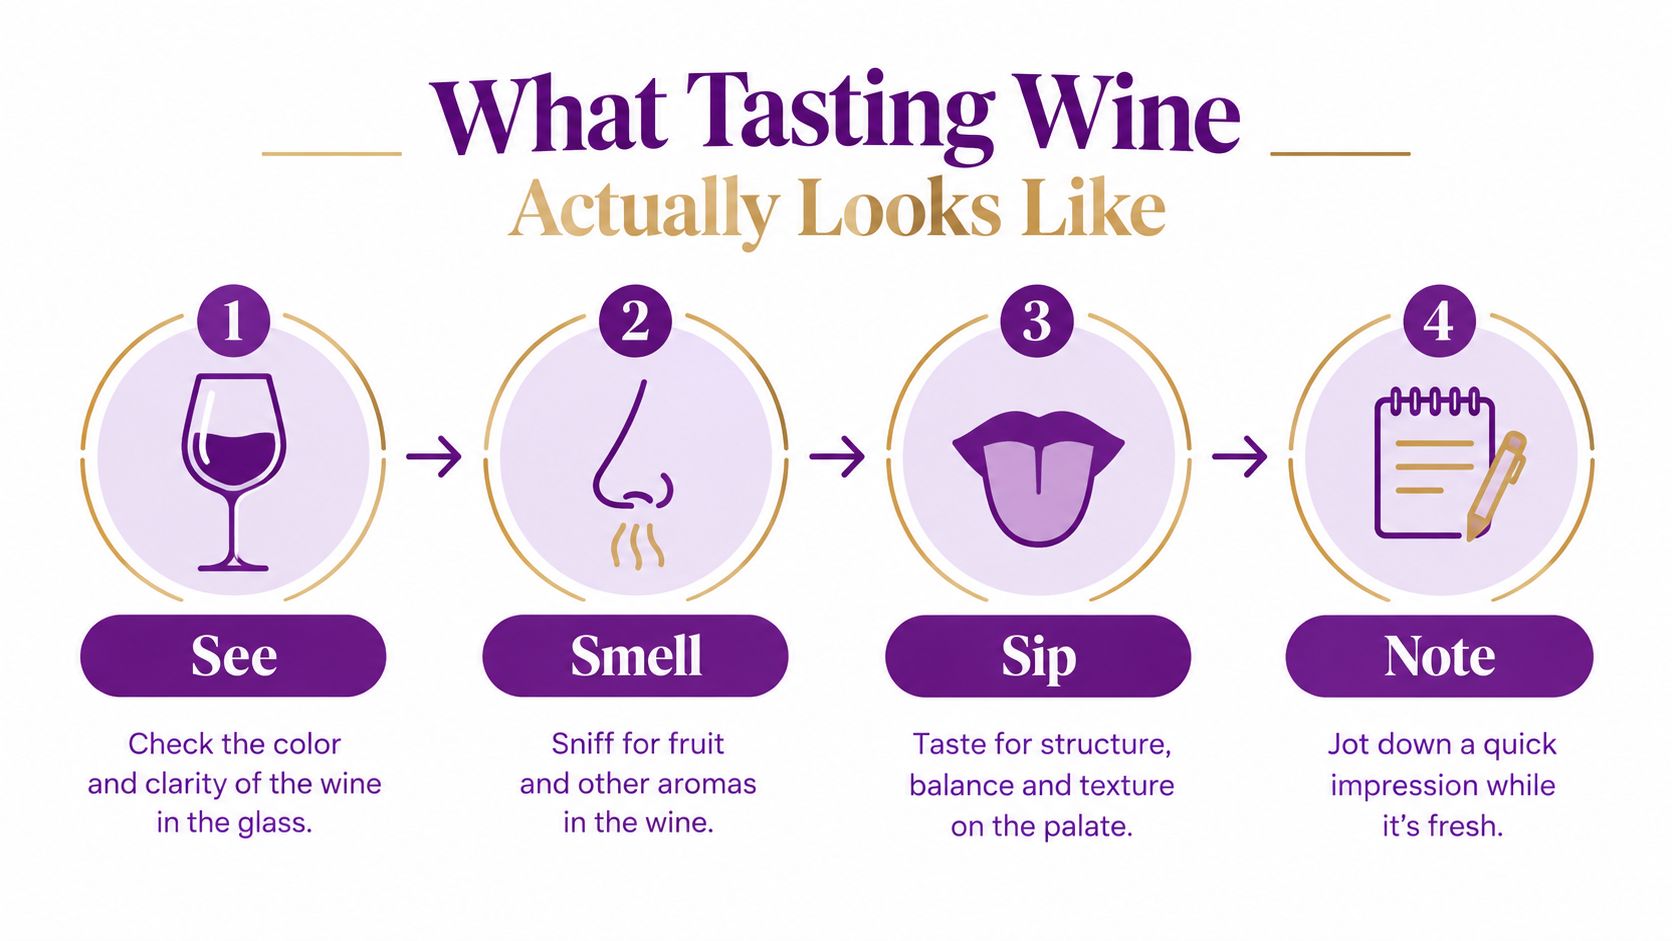
Here's what happens at each point:
- See: Look at color, clarity, and intensity before your expectations get involved.
- Swirl: Move the wine gently so oxygen helps release more aroma.
- Sniff: Smell once before swirling, then again after, because the two passes can reveal different layers.
- Sip: Take a small mouthful and notice sweetness, acidity, texture, weight, and flavor.
- Savor: Pay attention to what remains after you swallow or spit, especially the wine's finish.
You don't need special equipment. A standard tasting glass, a plain white surface, and about five minutes per wine are enough for a useful practice session. If you want a slightly longer primer, this simple wine tasting method gives you another easy reference.
Practical rule: You don't need to sound impressive. You need to notice one real thing at each step.
See the Wine Before You Smell It
The eye step is quick, useful, and often skipped. Before your nose starts making guesses, the glass can tell you about the wine's color, clarity, and visual intensity.
Hold the glass by the stem when you can. Your hand can warm the wine and leave fingerprints on the bowl, which makes the visual check harder. Place the glass over a white napkin or sheet of paper and tilt it between 30 and 45 degrees, as recommended in this visual wine tasting guide.
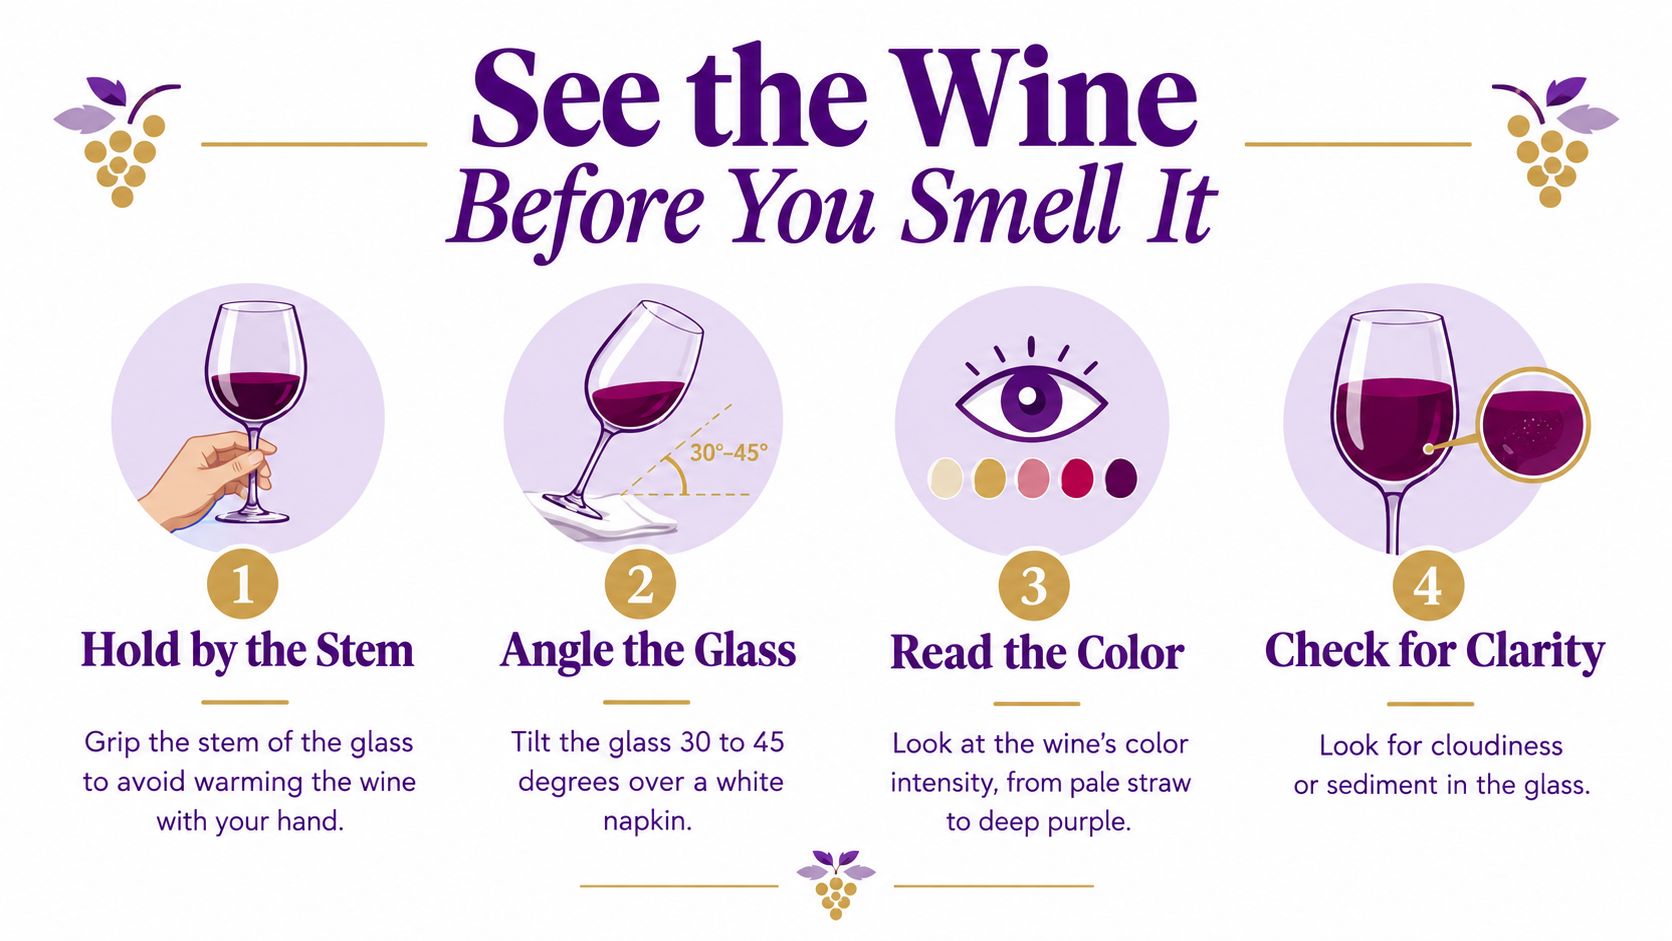
Look at three areas:
- The rim: A pale edge can give you a different impression from the darker center, especially in red wine.
- The core: This is the main pool of wine in the glass. Notice whether it looks pale, medium, or deep.
- The edge: Tawny or brown tones can point toward an older white wine or an oxidative style. Brick or brown tones in a red can suggest maturity.
Color isn't a precise age calculator, and it won't tell you whether a bottle is worth buying. It gives you a starting clue. A pale lemon wine may look fresh and young. A deep purple red may suggest a more concentrated style. A tawny white or brick-toned red may signal development, although winemaking choices also affect appearance.
Clarity adds another clue. A bright, clear wine may have been filtered. Haze or sediment isn't automatically a fault, but it tells you to pay attention. Sediment can appear as a wine develops, while cloudiness may deserve a closer look.
Try this tonight: choose any bottle, tilt the glass over something white, and name one thing the color tells you before you smell it. “Pale and bright” is enough. You're training observation, not trying to predict the whole wine.
Swirl and Sniff in Two Passes
Swirling isn't wine theater. It's a small way to expose more wine to oxygen and help aromas move into the space above the liquid. Keep the glass on the table if you're new to it, then make a slow circle for about five seconds. A gentle motion works better than a dramatic spin that sends Cabernet onto your shirt.
The more important habit is the two-sniff method. Smell once before swirling. Put your nose just above the rim and take a short, relaxed sniff. This first pass can catch the most volatile aromas, such as bright fruit, flowers, sharp spice, or citrus.
Then swirl and smell again after a brief pause. The second pass can bring out quieter notes, including oak, earth, herbs, or savory aromas. A standard tasting technique begins with this initial smell, followed by a second smell after swirling, because aeration changes what reaches your nose, as explained in this wine tasting evaluation guide.
Smell for families, not perfect answers
Wine isn't perfume. Perfume is designed to arrive at your nose immediately. Wine often needs a little coaxing, and your first impression may be broad rather than specific.
Start with a category:
- Fruit: citrus, apple, pear, cherry, berry, or dark fruit
- Plants: flowers, grass, fresh herbs, or dried herbs
- Spice: black pepper, baking spice, or sharp spice
- Non-fruit notes: earth, toast, vanilla, oak, or something savory
Don't force blackberry if all you smell is “dark fruit.” That broader answer may be more honest. Aroma perception also varies from person to person, and oral factors such as saliva composition and flow can affect how aromas are released in the mouth, according to this review of aroma perception. Struggling to name an aroma doesn't mean your palate is broken.
Practice with one glass. Sniff once and write one word. Swirl, sniff again, and write a second word. Maybe the first is “lemon” and the second is “toast.” Maybe both are just “fresh.” The point is noticing whether the second pass adds information.
Sip Slowly and Read the Structure
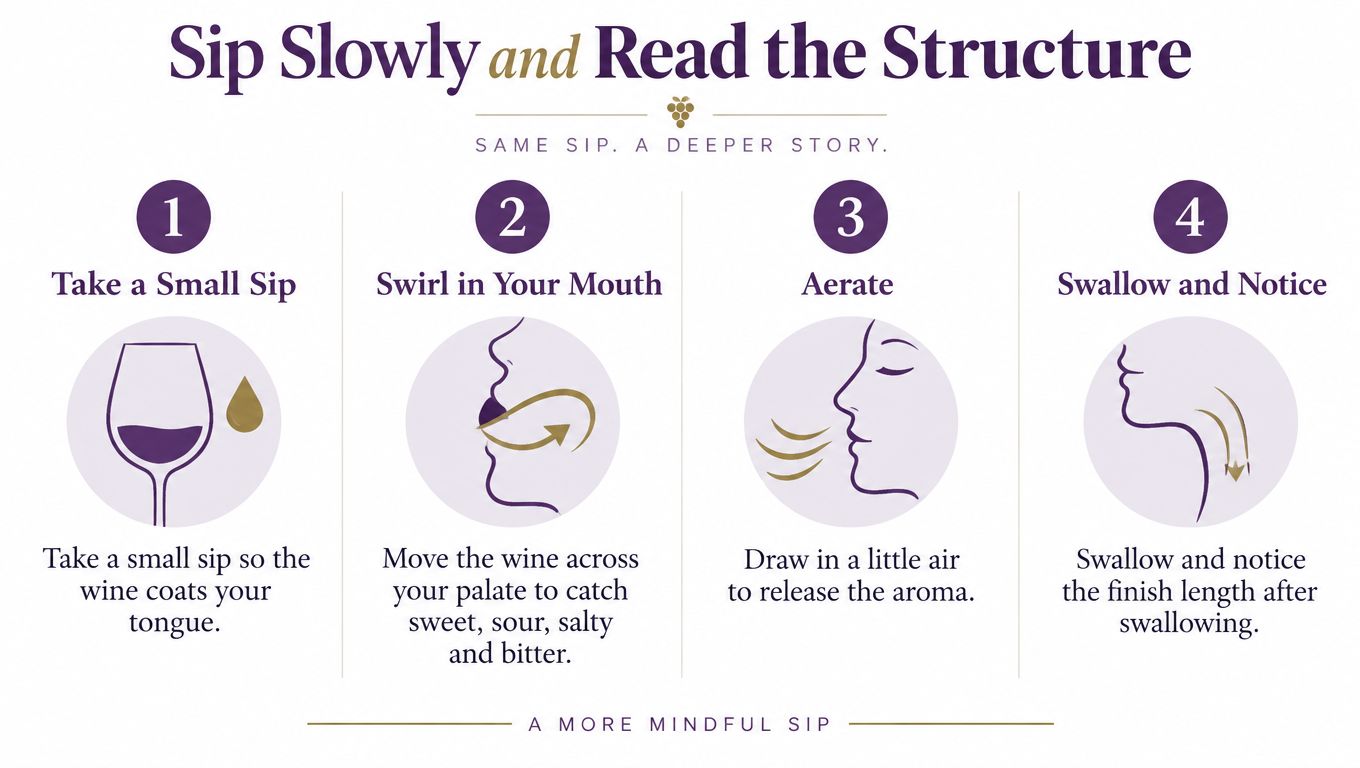
The sip is where the wine stops being an idea and becomes a physical experience. You don't need a large mouthful. A small sip lets the wine coat your mouth without overwhelming your senses.
Use four small moves:
- Take a small sip. Let the wine spread across your tongue.
- Move it around gently. Notice what happens at the front, sides, and back of your mouth.
- Hold it briefly. Give yourself a few seconds to feel the texture and shape.
- Swallow or spit. Then notice what remains.
Formal tasting protocols often use a measured sip of about 5 to 8 ml and hold it for roughly 5 seconds, while other tasting guides recommend keeping the wine in your mouth for about 3 to 5 seconds before swallowing or spitting, as shown in this wine tasting technique guide. You don't need laboratory precision at the dinner table. The useful idea is to slow down enough to feel the wine.
Translate sensation into plain language
Acidity feels like a mouthwatering prickle. A high-acid wine can make your cheeks tighten and encourage another sip, like biting into a lemon or green apple.
Tannin feels drying and slightly grippy, especially along your gums. It appears most clearly in many red wines, where it can feel a little like strong black tea. For a plain explanation of the term, see this guide to what tannin means in wine.
Body is the wine's weight. Water feels light. Milk feels heavier. Cream feels richer. Body describes how the wine sits in your mouth, not whether it's expensive or well made.
Finish is what lingers after swallowing or spitting. Does the flavor disappear immediately, or does something remain? You might notice citrus, spice, tannin, fruit, or a warm sensation.
Don't chase a long list of flavors before you understand the structure. A wine can smell like ripe peach and still taste dry. Fruit aroma and sugar are different things.
Better question: Does the wine make your mouth water, dry your gums, feel heavy, or disappear quickly?
Try this after your next sip: name the structure element you noticed most, then describe its feeling rather than its source. “Drying on my gums” is more useful than guessing which vineyard created the tannin.
Resetting Between Glasses in a Flight
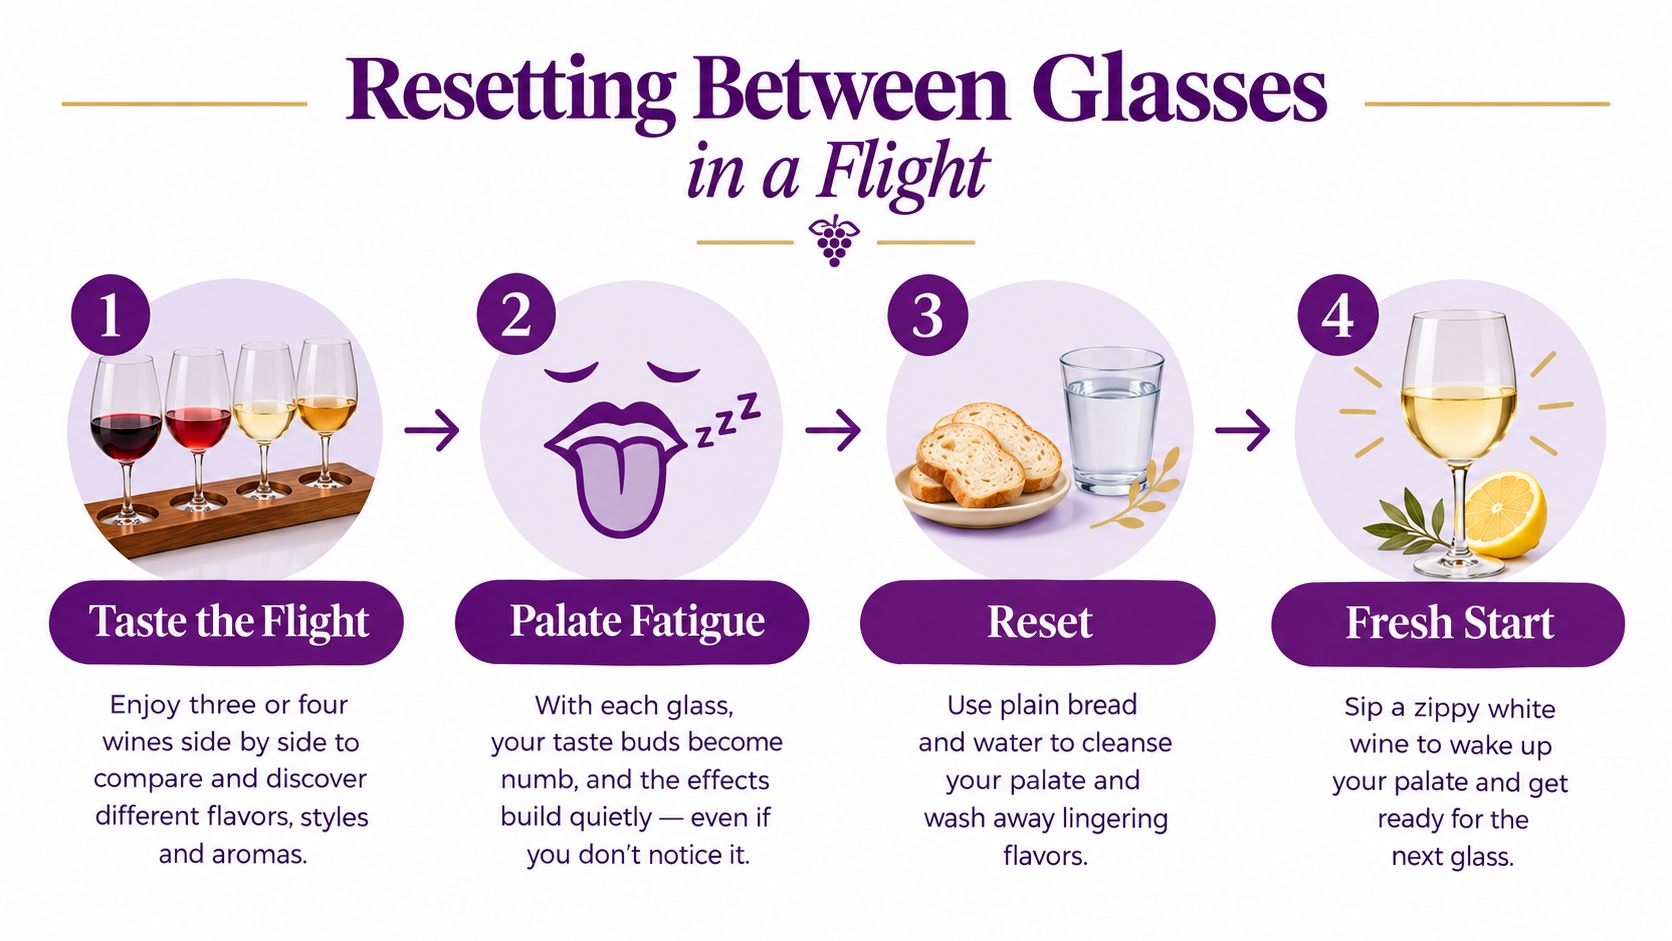
One glass is easy. You sip it over dinner, eat food, talk, and return to it without asking your palate to make difficult comparisons. A flight is different. With three or four wines side by side, your senses have to keep changing direction.
Palate fatigue builds gradually. A fresh, zippy white can start tasting flat after a richer wine, while a bold red can feel even more forceful after several sips. The later glass isn't necessarily changing. Your mouth and nose are carrying impressions from the earlier ones.
A reset can take less than a minute:
- Clear your nose: Sniff your own skin or a coffee bean to give your nose a neutral reference.
- Clear your tongue: Eat a plain cracker or a small piece of bread.
- Use cool water: Take a long sip and let your mouth settle before the next wine.
These are not sommelier tricks. They're practical ways to avoid letting one wine bully the next one. Professional sensory analysis uses controlled conditions such as identical glassware, randomized serving order, blind-coded samples, and a quiet, odor-free, temperature-controlled room. Industry guidance also recommends limiting a session to roughly 6 to 7 wines to reduce fatigue and sensory adaptation, as outlined in the OIV review of sensory analysis.
Taste lighter, fresher wines before heavier, more tannic ones when you have a choice. If the order is fixed, reset between pours and stay curious rather than declaring the last wine “too much” too quickly.
Spitting is also normal when you're tasting several wines. If a spittoon is offered, use it. Spitting keeps your palate and judgment more consistent across the flight, and nobody who knows wine will consider it rude.
For another practical way to compare wines, try this guide to practicing blind tasting.
Why Your Own Preference Matters More Than Nailing the Note
Many beginners think the goal is to identify the exact fruit in the glass. They smell a red wine, hear someone say “blackcurrant,” and panic because they got “cherry.” That isn't a failure. Aroma names are labels for memory, and different people connect the same smell to different memories.
Structure and mouthfeel often give you a more reliable answer. Two people can both smell blackberry and still disagree about the wine. One may love the mouthwatering acidity. The other may dislike the drying tannin. Neither person needs to win.
A correct tasting note that doesn't help you choose your next bottle isn't very useful.
Ask questions that lead to decisions:
- What did it feel like? Light, broad, sharp, silky, drying, or heavy?
- Would you order it again? Your honest answer matters more than a perfect aroma match.
- What would you pair with it? Think roast chicken, salty snacks, grilled vegetables, or nothing but a quiet evening.
Aroma still matters. It can show fruit, flowers, spice, oak, or earth, and it helps you build a personal map of wine. But don't treat naming a specific fruit as the score. If “plum” feels forced, write “dark fruit.” If you can't identify fruit at all, describe the texture instead.
Keep notes short enough that you'll use them. Three lines in your phone can capture the useful part:
Felt like: bright and lightly drying.
Would order again: yes, especially with food.
Pair with: roast chicken or salty fries.
That note will help you choose better than a dramatic paragraph full of guesses. The purpose of the five steps is confident preference, not a flawless tasting exam.
Practice This Tonight and Build the Habit
Use any bottle already on your counter. The exercise takes about 10 minutes, and it works better with a wine you haven't studied beforehand.
Pour a two-ounce pour and place the glass next to a plain white napkin or sheet of paper. Look first. Write one color word before you smell the wine.
Then swirl and smell in two passes. Write one smell word, even if the word is broad. “Citrus,” “red fruit,” “herbal,” and “earthy” all count.
Take a small sip and move it around your mouth. Write one texture word, such as “fresh,” “drying,” “soft,” “light,” or “rich.” Taste a plain cracker and sip water between sips so your palate doesn't carry every impression forward.
Repeat the same exercise tomorrow with a different wine. Compare the notes side by side. You may notice that one wine is more acidic, another has more body, or a third leaves a longer finish. You don't need to remember every aroma. You need to notice differences.
Daily repetition teaches more than one ambitious tasting night. A short guided routine can make that practice easier, especially if you want lessons that take about 5 minutes, practice quizzes, and an AI sommelier for questions that come up while you're tasting.
Build your wine confidence with A to Wine, which offers short daily wine lessons, practice quizzes, and an AI sommelier to help you understand what's in your glass. Start with one bottle, use the five steps, and turn tonight's tasting into a habit you can repeat.